
Tutorial 1 Part 5: 師弟とは?⇒
To change your Job, the procedure is actually very simple:
1. Talk to the guildmaster.
2. Take and complete the Job Change quest.
3. Report back to the guildmaster.
4. Strip! (no equipment allowed, not even pets)
5. Voila! You're now part of the club.
6. Re-equip yourself and talk to the guildmaster for a small gift.
... To this day, I still don't know why you must butt-naked to complete the Job Change. It's so... indecent and such ripe material for the fantasies of perverted ladies and gentlemen.
Anyway, this post will cover the Job Change quests for the Fighters: Swordsman, Fencer, Scout and Archer.
Note: For prospective Swordsmen, Fencers and Scouts, you must have 10 STR in order to qualify for Job Change. For Archers-to-be, the requirement is 10 INT instead.
To make things simpler, I have stripped my characters before reporting, so that I can complete the Job Change in one smooth flow after the report. Whether you want to do the same or not is up to you =3.
Note: Remember to report back to Joker Bro after you're done changing your Job. In fact, the system will remind you again when you're leaving the Guild Palace after your Job Change before teleporting you to DT. After your report, Joker Bro will gift you with a Base Experience Enhancer 50 (Beginner) (経験値ふえ~る 50 (ビギナー)) and a Tiny's Secret Storage Technique (Beginner) (タイニー秘伝収納術(ビギナー)).
Tutorial 1 Part 4b: ⇒ Fighter Job Change Quests
Click the following links to jump to the job you're looking for:
[F01] Swordsman
[F02] Fencer
[F03] Scout
[F04] Archer
~~~~~~~~~~~~~~~~~~~~~~~~~~~~~~~~~~~~~~~~~~~~~~~~~~~~~~~~~
[F01] Swordsman
Step 1: Go to the Swordman Guild (Guild Palace 2F, east room):

Step 2: Talk to the Swordsman Master. Choose option #1 (「ソードマン」になりたい!) to apply for Job Change:

You'll be asked whether to take the test or not. Choose option #1 (試すにきまってる!) to do so:

Step 3: You'll be asked to fight Bawoos (バウ) and bring 1 Meat (肉) as proof of your labors to the Swordsman Master. If you already have this item, then skip to Step 7. If not, carry on with the following steps.
Step 4: Exit Acropolis City via the northern exit and head north until you reach Snov Mountain Road (スノップ山道). Ctrl+W to check the world map for your current location and where you should go:

The area in the red box.
Follow the road and speak to Bunota (ブノータ). Choose option #1 (ソードマンの転職できました) for some more details about your task.
Step 5: Fight Bawoos until you get a Meat from them. Bawoos are aggressive monsters so be careful not to be mobbed.

The victim

MEAT
Step 6: Once you're done here, speak to Bunota again, choosing the same option as above. He'll ask if you'll like him to send you back to the Guild Palace:

Choose option #1 (お願いします) to accept his offer:

Step 7: Go back to the Swordsman Guild and speak to the Swordsman Master to report (you might want to strip off all your equipment before talking to him). After taking your Meat, you'll be asked whether to go on with the Job Change. Choose option #1 (ソードマンになるぞ!) if you're ready:


Step 8: Upon Job Change, you'll be taught the first level of the Swordsman's starting skill, Sword Draw (居合い). With this, the Navigation Window will close as well, marking the end of the event. Re-equip yourself and speak to the Swordsman Master again. You'll receive a Swordsman's Proof (ソードマンの証), a chest accessory that gives +1 to Slash Damage.

Go to top
~~~~~~~~~~~~~~~~~~~~~~~~~~~~~~~~~~~~~~~~~~~~~~~~~~~~~~~~~
[F02] Fencer
Step 1: Go to the Fencer Guild (Guild Palace 2F, west room):

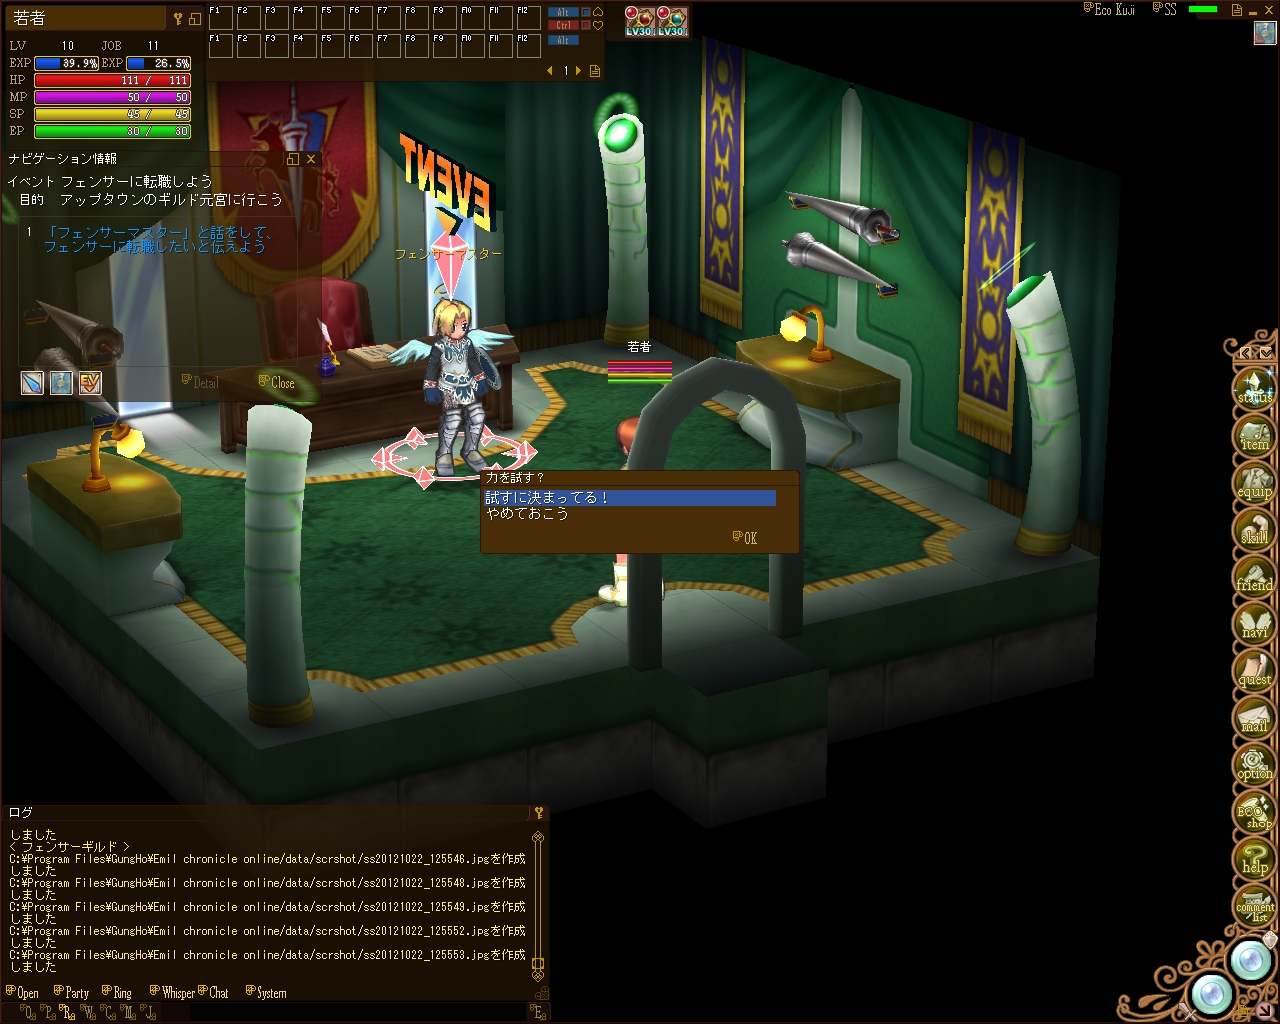
Step 2: Talk to the Fencer Master. Choose option #1 (「フェンサー」になりたい!) to apply for Job Change:

You'll be asked whether to take the test or not. Choose option #1 (試すにきまってる!) to do so:
Step 3: You'll be asked to fight Killer Bees (キラービー) and bring 1 Bee Needle (ビーの針) as proof of your labors to the Fencer Master. If you already have this item, then skip to Step 7. If not, carry on with the following steps.
Step 4: Exit Acropolis City via the western exit. You'll now be in the West Acronia Plains (西アクロニア平原).

Where you should be now (boxed in red).
Follow the navi cursor and talk to the West Gate Guard with the EVENT tag to learn more about your errand:

Step 5: Fight Killer Bees until you get a Bee Needle from them. Note that Killer Bees, though usually peaceful monsters, will assist each other when attacked by mobbing the offending player. In other words, avoid fighting Bees found in groups and go for those that are relatively isolated:

The target.

The item you'll need from it.
Step 6: Once you're done here, speak to the Guard again. He'll ask if you'll like him to send you back to the Guild Palace:

Choose option #1 (お願いします) to accept his offer:

Step 7: Go back to the Fencer Guild and speak to the Fencer Master to report (you might want to strip off all your equipment before talking to him). After taking your Bee Needle, you'll be asked whether to go on with the Job Change. Choose option #1 (フェンサーになります!) if you're ready:


Step 8: Upon Job Change, you'll be taught the first level of the Fencer's starting skill, Lightning Spear (ライトニングスピア). With this, the Navigation Window will close as well, marking the end of the event. Re-equip yourself and speak to the Fencer Master again. You'll receive a Phantom Mask (ファントムマスク), a facial accessory that gives +1 to Pierce Damage.
Go to top
~~~~~~~~~~~~~~~~~~~~~~~~~~~~~~~~~~~~~~~~~~~~~~~~~~~~~~~~~
[F03] Scout
Step 1: Go to the Scout Guild (Guild Palace 2F, south room):

Step 2: Talk to the Scout Master. Choose option #1 (「スカウト」になりたい!) to apply for Job Change:

You'll be asked whether to take the test or not. Choose option #1 (試してみようかな……) to do so:

Step 3: You will be whisked away to the entrance of the Continental Cave, where a Scout Guild Member is waiting for you. Speak to him for your next instructions:

You will be asked to return to the Scout Guild by yourself. Note that your save point will now be set here at this location, so you can forget about going back via death-and-respawn or by using a Time-Space Key. Your only option now is to run, run and run your way home.
Your current location is the map in the red box. The quickest way back to Acropolis is indicated by the red arrow:

From your current location (near the green ①) as shown in the map below, make your way down to the exit at the lower left corner of the map:

You'll enter the next map from its lower left corner as indicated by the small yellow square. Make your way towards the exit at the top of the map:

You find yourself at the lower right side of the East Acronia Plains (where the yellow box is). From here, just make your way back to the Scout Guild:

Step 4: Report to the Scout Master (you might want to strip off all your equipment before talking to her). Now that you've proven yourself worthy, you'll be asked if you're sure about becoming a Scout. Choose option #1 (スカウトになるぜ!) to go on with the Job Change:


Step 5: Upon Job Change, you'll be taught the first level of the Scout's starting skill, Hiding (ハイディング). With this, the Navigation Window will close as well, marking the end of the event. Re-equip yourself and speak to the Scout Master again. You'll receive a Phantom Thief Mask (怪盗マスク), a facial accessory that gives +5 to S.Avoid.
Go to top
~~~~~~~~~~~~~~~~~~~~~~~~~~~~~~~~~~~~~~~~~~~~~~~~~~~~~~~~~
[F04] Archer
Step 1: Go to the Archer Guild (Guild Palace 2F, north room):

Step 2: Talk to the Archer Master. Choose option #1 (「アーチャー」になりたい!) to apply for Job Change:

You'll be asked whether to take the test or not. Choose option #1 (もちろん!) to do so:

Step 3: The Archer Master will give you a Wooden Branch (木の枝) and a Cockko's Feather (コッコーの羽). You will be told that these are the materials needed for producing Hand-Made Arrows (手作りの矢), and you are to make some with these materials at the Smithy (鉄火場) at Downtown:


Step 4: Enter the Smithy, situated at the southern part of Downtown, next to the Weapon Shop:

Step 5: Speak to the Smithy Employee and choose option #4 (「矢」を作ってもらう):

Step 6: Scroll down until you come to the recipe with both Wooden Branch and Cockko Feather. Click the ▲ button once to use 1 x each item for production and then click "OK" to proceed:

Step 7: You should receive 50 Hand-Made Arrows. Return to the Archer Master and report (you might want to strip off all your equipment before talking to her). She will ask you once more if you really wish to become an Archer. Choose option #1 (しますっ!) if you're ready:


Step 8: Upon Job Change, you'll be taught the first level of the Archer's starting skill, Create Throwing Weapon (投擲武器作成). With this, the Navigation Window will close as well, marking the end of the event. Re-equip yourself and speak to the Archer Master again. You'll receive a Practice Bow (練習用の弓) and a Quiver (腰矢筒):

The Archer Master will ask if you know how to use a bow; choose option #1 (知りませーん!) if you need some instructions from her, and option #2 (もちろん知ってるよ!) if you don't:

Just remember that bows, rifles and 1h pistols are all equipped on the left hand and ammunition on the right, as shown below:

It's kind of sad that they nerfed the Archer quest so much that there's not a single thread of challenge remaining now. Unlike Spellusers' quests, you don't even need to answer any question, it's all just talk to NPC and done.
ReplyDeleteI can relate to this =w=. The Miner's quest have similar changes, but then again the item needed is a pain to get sometimes (and we need three of those too), unlike the Wooden Branch and Cockko Feather which are much easier to find =/
Delete